


The Foundation: Prepping Your Hair for Perfection
The secret to any truly spectacular hairstyle lies not just in the styling itself, but in the meticulous preparation that precedes it. Think of your hair as a canvas; without the right primer, even the most skilled artist would struggle to create a masterpiece. For a celebrity blowout, this foundational stage is absolutely critical for achieving lasting volume, shine, and a frizz-free finish. Skimping here will undoubtedly compromise the final result, leaving your hair falling flat or succumbing to humidity far too quickly.
Cleanse and Condition with Purpose
A great blowout starts with freshly washed hair. However, not all shampoos and conditioners are created equal when it comes to preparing for heat styling. Opt for products specifically formulated to add volume, provide moisture without weighing hair down, and protect against heat. Look for sulfate-free options to prevent stripping your hair of its natural oils, which can lead to dryness and breakage over time. For fine hair, a volumizing shampoo and conditioner will be your best friends, lifting the roots and adding body. Those with thicker or coarser hair might benefit from a smoothing or hydrating duo that tames frizz while still allowing for bounce.
- Shampoo: Gently massage into your scalp, focusing on cleansing the roots. Rinse thoroughly until the water runs clear.
- Conditioner: Apply from mid-lengths to ends, avoiding the scalp to prevent oiliness. Allow it to sit for a few minutes to deeply hydrate, then rinse completely. Lingering conditioner residue can make hair heavy and greasy, hindering volume.
The Art of Towel Drying
This seemingly simple step is often overlooked but plays a significant role in reducing drying time and minimizing heat damage. Aggressively rubbing your hair with a towel can rough up the cuticle, leading to frizz and tangles. Instead, gently squeeze excess water from your hair. Then, wrap your hair in a microfibre towel or an old cotton t-shirt. These materials are much gentler than traditional terrycloth towels, absorbing water more efficiently without causing friction or disrupting the hair cuticle. Aim to get your hair about 60-70% dry before applying any styling products. This not only reduces the amount of time your hair is exposed to direct heat but also ensures products are distributed evenly without being diluted by excessive water.
The Non-Negotiable: Heat Protectant
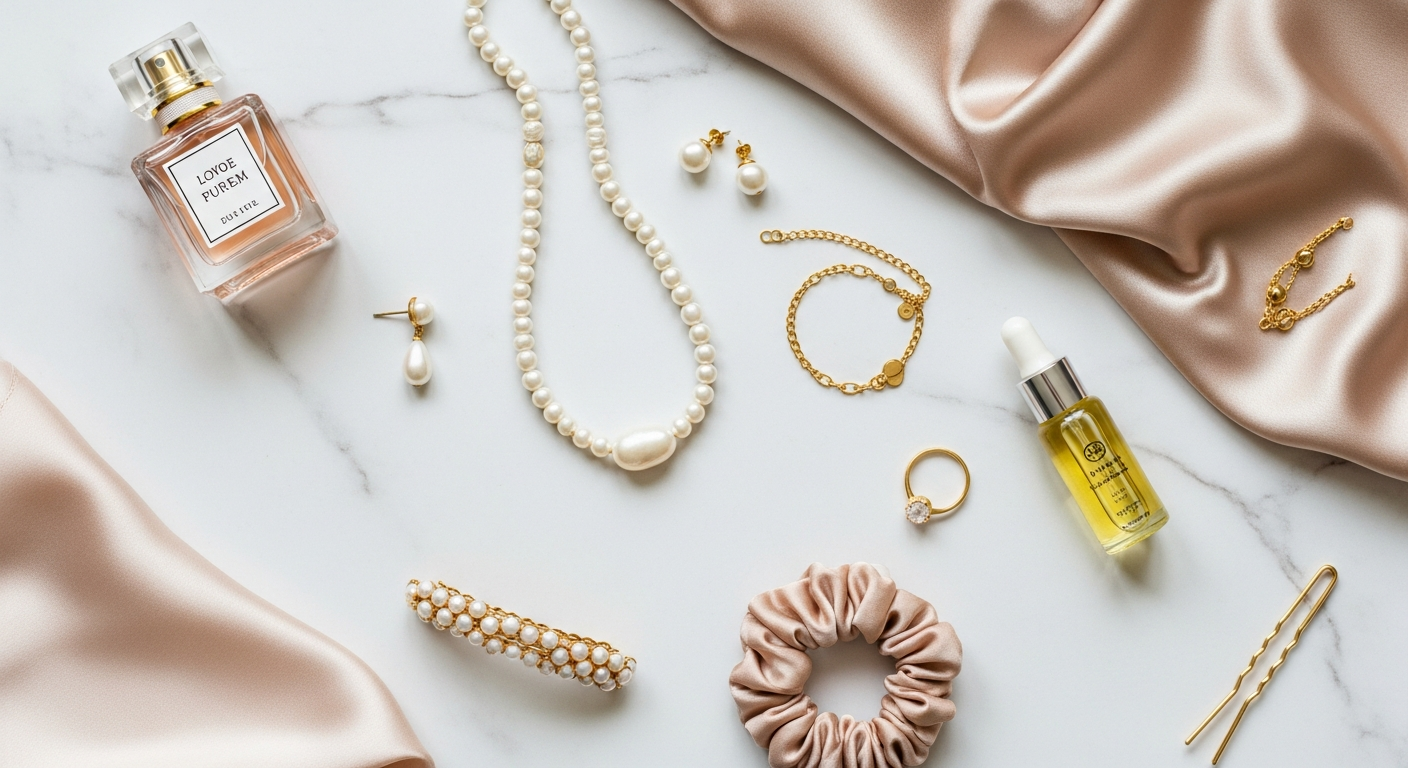
If there’s one product you absolutely cannot skip in your quest for a perfect blowout, it’s heat protectant. Just as you wouldn a dazzling Celebrity Engagement Ring Styles 2026 on your finger with care, you must protect your precious strands from the intense heat of your blow dryer. High temperatures can cause significant damage, leading to dryness, split ends, and a dull appearance. A good heat protectant creates a barrier between your hair and the heat, minimizing damage while often adding shine and helping to smooth the cuticle. Spray it generously and evenly throughout your damp hair, from roots to ends, ensuring every strand is coated. Look for formulas that also offer detangling benefits or provide a light hold.
Building the Volume: Root Lifters and Mousse
Once your hair is towel-dried and protected, it’s time to lay the groundwork for that coveted volume. This is where root lifters and volumizing mousses come into play.
Root Lifter: Applied directly to the roots, these products typically come in spray or gel form and are designed to give your hair a boost right where it starts. Section your hair and spray directly onto the scalp around the crown and sides.
Volumizing Mousse: A golf-ball sized amount of mousse, distributed evenly from roots to ends, can provide overall body and hold without stiffness. Work it through your hair with your fingers or a wide-tooth comb to ensure even distribution. These products not only add volume but also provide a degree of hold, helping your blowout last longer. Choose products appropriate for your hair type – lighter formulas for fine hair, stronger hold for thicker hair that struggles to maintain volume.
Tools of the Trade: Your Blowout Arsenal
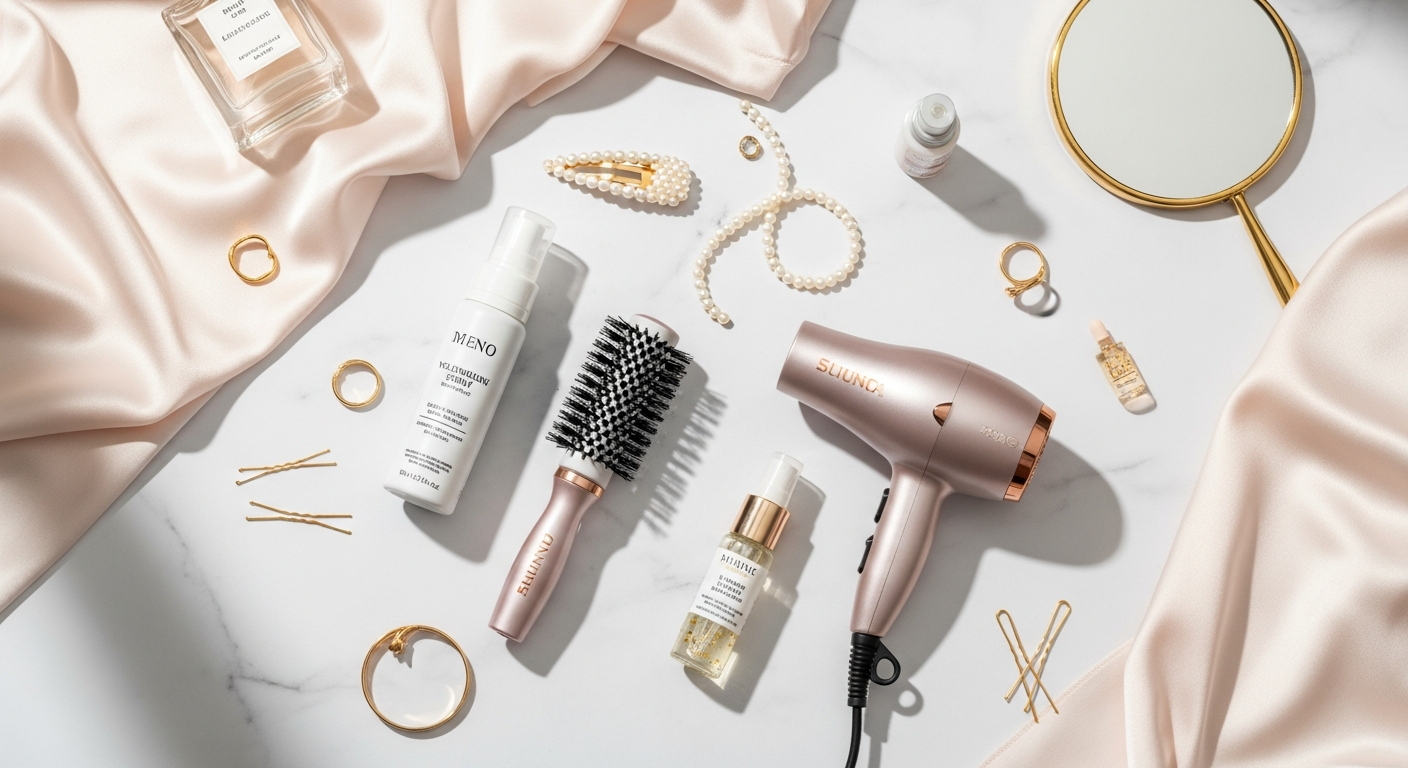
Achieving a celebrity-worthy blowout at home is as much about technique as it is about having the right equipment. Much like a chef relies on a specific set of knives for different tasks, or how selecting the Best Jewelry For Different Necklines requires the perfect pendant or chain, your hair styling success hinges on having an effective and appropriate toolkit. Investing in quality tools not only makes the process easier and faster but also contributes significantly to the health and appearance of your hair.
The Hero: Your Hair Dryer
This is arguably the most crucial piece of equipment. Forget the basic travel dryer; for a true celebrity blowout, you need a powerful, professional-grade hair dryer.
- Wattage: Look for a dryer with at least 1800-2000 watts. Higher wattage means a stronger motor and faster drying time, which equates to less heat exposure for your hair.
- Technology:
- Ionic dryers: These emit negative ions that break down water molecules quickly, reducing drying time and sealing the hair cuticle. The result is smoother, shinier hair with less frizz.
- Ceramic or Tourmaline dryers: These distribute heat more evenly and gently, minimizing hot spots that can damage hair. Tourmaline models also produce negative ions and infrared heat, further enhancing shine and reducing frizz.
- Settings: Ensure your dryer has multiple heat and speed settings, including a vital “cool shot” button. The cool shot is essential for sealing the cuticle and setting the style, locking in shine and volume.
- Nozzle Attachment: Always use the concentrator nozzle. This attachment directs the airflow precisely, allowing you to control the heat and focus on specific sections, crucial for smoothing and shaping.
The Shaping Stars: Round Brushes
Round brushes are indispensable for creating volume, waves, and sleekness. You’ll likely need a couple of sizes for different areas of your head.
- Bristle Type:
- Boar Bristle: Excellent for creating tension, smoothing the cuticle, and adding shine. Ideal for fine to medium hair.
- Mixed Bristle (Boar & Nylon): Offers the best of both worlds – the smoothing power of boar and the detangling ability of nylon. Great for most hair types.
- Ceramic or Metal Barrel: These barrels heat up when exposed to the dryer’s airflow, acting like a curling iron to set waves and volume. They can speed up drying time but require careful use to avoid overheating.
- Size Matters:
- Large (2.5-3 inches+): Perfect for creating big, bouncy volume, looser waves, and smoothing long hair. Use for the top and back sections.
- Medium (1.5-2 inches): Versatile for most hair lengths, great for creating lift, C-shaped curls, and general styling.
- Small (1 inch or less): Ideal for shorter hair, bangs, or creating tighter curls and root lift in specific areas.
Essential Supporting Cast: Clips and Combs
- Sectioning Clips: You’ll need several strong, duckbill or jaw clips to neatly section your hair. Proper sectioning is the bedrock of a controlled and effective blowout.
- Paddle Brush or Wide-Tooth Comb: Use these to gently detangle your hair after washing and before applying products. Never start a blowout with tangled hair.
- Rat-Tail Comb: Handy for creating precise sections, backcombing for extra volume, and perfecting your part.
Finishing Touches: Products for Longevity and Shine
While not strictly “tools,” these products are essential for perfecting and preserving your blowout.
- Lightweight Hairspray: For flexible hold without stiffness.
- Shine Serum or Oil: A tiny amount applied to the ends will add incredible gloss and tame any flyaways.
- Dry Shampoo: Your best friend for extending the life of your blowout, absorbing oil and adding volume on subsequent days.
By assembling this arsenal of high-quality tools and products, you’re not just buying equipment; you’re investing in the ability to consistently achieve that professional, polished look right at home. The difference in results will be immediately noticeable, transforming your hair from ordinary to absolutely extraordinary.
The Technique: Mastering the Art of Sectioning and Drying
Initial Rough Dry: The First Step Towards Control
Before you even pick up your round brush, perform a rough dry. Using your hair dryer on a medium heat and speed setting, gently tumble dry your hair with your fingers until it’s about 80% dry. This reduces the overall drying time with the brush, minimizing heat exposure and making the sectioning process much easier. Don’t aim for smoothness here; the goal is simply to remove excess moisture. If you have bangs, roughly dry them first, shaping them into their desired direction.
Strategic Sectioning: The Blueprint for Volume
Proper sectioning is non-negotiable for a professional-looking blowout. It allows you to focus on one area at a time, ensuring even drying and consistent results.
- Divide and Conquer: Using a rat-tail comb, create clean, horizontal sections. Start by dividing your hair into three main horizontal sections:
- Bottom Section: From just above your ears down to your nape.
- Middle Section: From your temples to the top of your ears.
- Top Section: Everything else, including the crown and front pieces.
- Secure with Clips: Pin up the middle and top sections securely with your duckbill or jaw clips. You’ll always work from the bottom up.
- Smaller Sub-Sections: Within each main section, you’ll work with smaller sub-sections. The size of these sub-sections should be no wider than your round brush and about 1-2 inches thick. If the section is too large, the heat won’t penetrate evenly, and you won’t get proper lift or smoothness.
The Blowout Ballet: Drying Each Section
This is where the magic happens. Remember to always keep the concentrator nozzle on your dryer.
1. Start at the Nape:
- Take your first sub-section from the bottom-most part of your hair.
- Place your round brush underneath the section, close to the roots.
- Aim the dryer nozzle downwards, directing the airflow along the hair shaft, following the brush as you pull it through.
- Maintain tension as you pull the brush away from the roots and down towards the ends. This tension is crucial for smoothing the cuticle and creating shine.
- For volume, slightly lift the hair at the roots as you dry, angling the brush upwards.
- Once you reach the ends, gently roll the brush inwards or outwards, depending on your desired curl or flick. Hold for a few seconds with the heat, then hit the cool shot button while the hair is still wrapped around the brush. This sets the style and locks in the shine.
- Unroll the brush gently and either let the hair fall or lightly clip it up to cool completely if you want extra hold.
2. Work Your Way Up:
- Continue this process, moving horizontally across the bottom section, then releasing the middle section and repeating.
- Always point the nozzle downwards to encourage smoothness and shine, preventing frizz.
3. The Crown and Top Sections: Maximum Volume Zone
- For the crown, take vertical sections. Lift the hair straight up from the scalp with your round brush, drying from the roots upwards and outwards. This technique maximizes root lift.
- Use the cool shot generously here.
- For the front sections and bangs, decide on your desired style. If you want a face-framing sweep, dry them towards your face, rolling the brush under. For more volume, dry them upwards and away from your face, then gently sweep into place once cool.
4. The Face-Framing Pieces:
- These are critical for the overall look. Take smaller sections around your face.
- For a soft, voluminous sweep, dry these sections by pulling them away from your face and slightly upwards, rolling the ends under or out. Always use the cool shot.
Consistency and Patience
The key to mastering this technique is consistency in your movements and patience. Don’t rush through sections. Ensure each section is completely dry and cooled before moving on or disturbing it. The tension you apply with the brush, combined with the directed heat and the crucial cool shot, is what creates that sleek, voluminous, and long-lasting finish synonymous with a celebrity blowout. Practice makes perfect, and soon you’ll find your rhythm, transforming your hair with confidence and ease.
Adding Volume and Polish: The Finishing Touches
You’ve meticulously dried and shaped each section of your hair, and it’s already looking fabulous. But to truly elevate your at-home blowout to celebrity status, the finishing touches are paramount. These final steps are what give your hair that extra bounce, impeccable shine, and lasting hold, transforming a good blowout into an extraordinary one. Just as a perfectly chosen piece from the Best Jewelry For Different Necklines guide can complete an outfit, or a carefully selected fragrance from the Celebrity Perfume Choices And Trends can define your presence, these finishing techniques will define your blowout.
Brushing Out for Seamless Perfection
Once all sections are dry and have had a moment to cool (this is crucial for setting the style), resist the urge to immediately run your fingers through your hair. Instead, gently brush through your entire head with a soft-bristle paddle brush or a wide-tooth comb. This helps to meld the individual sections into a cohesive, flowing style, creating that seamless, bouncy look without disrupting the volume you’ve built. Start from the ends and work your way up, being gentle to avoid creating frizz. The goal is a soft, natural flow, not stiff individual curls.
Strategic Teasing (Optional, but impactful)
For an extra boost of dramatic volume, especially at the crown, a little strategic teasing can work wonders.
- Section: Take a thin section of hair at the crown, about 1-2 inches wide.
- Tease: Hold the section straight up. Using a fine-tooth comb or a dedicated teasing brush, gently push the hair down towards the scalp in short, repetitive strokes, starting a few inches from the roots.
- Smooth: Once you’ve created a cushion of volume at the roots, gently smooth the top layer of the teased section with your comb to hide the backcombing, leaving a sleek surface.
- Repeat: Do this for 2-3 sections across the crown for maximum impact.
Locking it In: Hairspray for Hold and Flexibility
A good quality hairspray is essential for ensuring your celebrity blowout lasts. However, the key is to use it judiciously to maintain natural movement, not create a helmet-like stiffness.
- Application: Hold the can at least 10-12 inches away from your head and mist evenly.
- Type: For most blowouts, a flexible hold or medium-hold hairspray is ideal. This allows your hair to retain its natural bounce and movement while keeping frizz at bay and holding your style. If you have very fine hair or are battling extreme humidity, a stronger hold might be necessary, but always err on the side of lightness.
- Volume Boost: For extra root lift, you can lift sections of hair and spray underneath at the roots before letting them fall back down.
Illuminating Shine: The Gloss Factor
What truly sets a celebrity blowout apart is its incredible shine and smoothness. This is where a shine serum or oil becomes your secret weapon.
- Amount: Use a very small amount – typically one or two drops, warmed between your palms. Less is definitely more to avoid making your hair greasy.
- Application: Gently smooth the product over the mid-lengths and ends of your hair. Pay particular attention to any areas prone to frizz or flyaways. Avoid applying directly to the roots, as this can weigh down volume.
- Benefit: A good shine product will seal the cuticle, enhance gloss, and provide a final layer of protection against humidity, giving your hair that luminous, healthy look you see on the red carpet.
Accessorize (Optional)
While the blowout itself is a complete look, sometimes a carefully chosen accessory can elevate it further. A sleek headband, a delicate barrette, or even a silk scarf can add a touch of personal style and sophistication. This is where your understanding of complementary elements, much like selecting the perfect necklace from our guide on the Best Jewelry For Different Necklines, comes into play. Consider the occasion, your outfit, and your personal aesthetic. Just as Celebrity Perfume Choices And Trends often reflect a star’s persona, your choice of accessory can subtly communicate your style.
With these finishing touches, your at-home celebrity blowout is complete. Stand back and admire the volume, the shine, and the undeniable confidence that comes with perfectly styled hair. You’ve not just styled your hair; you’ve crafted a statement.
Maintaining Your Masterpiece: Longevity Tips
You’ve invested time, effort, and the right techniques to achieve that stunning celebrity blowout. Now, the goal is to make it last as long as possible, ideally for several days, so you can wake up feeling fabulous without reaching for your styling tools every morning. Just as you’d carefully safeguard a precious piece from the Celebrity Engagement Ring Styles 2026 collection, you’ll want to protect your freshly styled hair. These maintenance tips are crucial for extending the life of your blowout, allowing you to enjoy voluminous, frizz-free hair day after day.
The Nighttime Ritual: Protecting Your Style While You Sleep
Sleeping is often the biggest enemy of a fresh blowout, but with a few smart strategies, you can minimize damage and preserve your style.
- Pineapple Method: Before bed, gently gather all your hair into a very loose, high ponytail or bun on the very top of your head, securing it with a soft scrunchie or a silk hair tie. The goal is to keep the hair from being crushed against your pillow, preserving volume at the roots.
- Silk Pillowcase: This is a game-changer. Silk or satin pillowcases create less friction than cotton, which means less frizz, fewer tangles, and smoother hair. They also help to retain your hair’s natural moisture and oils.
- Don’t Go to Bed with Product-Heavy Hair: If you used a lot of hairspray, a quick, gentle brush-through with a soft boar bristle brush can help distribute natural oils and prevent stiffness before bed.
Dry Shampoo: Your Second-Day Savior
Dry shampoo is an absolute essential for extending the life of any blowout. It’s designed to absorb excess oil and refresh your roots, adding volume and making your hair look freshly washed.
- Proactive Application: Don’t wait until your hair looks greasy. On the evening of your blowout, or the morning of the second day, lightly mist dry shampoo at your roots, especially around your hairline and crown. This absorbs oil before it even starts to show.
- Technique: Hold the can about 8-10 inches away from your head, lift sections of hair, and spray directly onto the roots. Let it sit for a minute or two to absorb, then gently massage your scalp with your fingertips or brush it through.
- Volume Boost: Many dry shampoos also offer volumizing properties, giving your roots an extra lift.
Battling Humidity and Moisture
Humidity is the nemesis of a perfectly smooth blowout.
- Anti-Humidity Spray: Invest in a good anti-humidity spray and lightly mist it over your finished blowout. These products create a barrier that repels moisture, keeping frizz at bay.
- Avoid Steam: When showering, wrap your hair in a shower cap. Better yet, use a fabric-lined shower cap that can help absorb any moisture that might penetrate. Keep your bathroom fan on or open a window to reduce steam.
- Hands Off: Resist the urge to constantly touch your hair. The oils from your hands can transfer to your strands, making them appear greasy and flattening your style.
Strategic Touch-Ups: Reviving Your Style
Even with the best maintenance, some areas might need a little refresh.
- Curling Iron/Flat Iron: For pieces that have lost their curl or developed a slight bend, use a curling iron or flat iron to gently re-shape them. Use very small sections and ensure you apply heat protectant to just those sections.
- Round Brush & Dryer: If your roots are looking a bit flat, you can do a mini-blowout on just the top sections. Dampen the roots slightly with a spray bottle, apply a little root lifter, and re-dry with your round brush and dryer, focusing on lift. Always finish with a cool shot.
- Volumizing Spray: A quick spritz of a volumizing spray or texturizing spray can revive body and texture.
Workout Wisdom
If you exercise, maintaining your blowout requires extra steps.
- Loose Bun/Ponytail: Again, a high, loose bun or ponytail helps keep hair off your neck and minimizes sweat absorption.
- Headband: A sweat-wicking headband can help absorb moisture around your hairline.
- Post-Workout Dry Shampoo: After your workout, let your hair air dry completely from any sweat. Then, apply dry shampoo generously to your roots and blow-dry on a cool setting to help refresh and add volume.
By incorporating these practices into your routine, you can significantly extend the life of your celebrity blowout, allowing you to enjoy beautiful, voluminous hair for days, reducing styling time, and boosting your confidence with every movement. This mindful approach to hair care ensures your masterpiece endures.
Common Blowout Mistakes to Avoid
Achieving that perfect celebrity blowout at home is a skill that improves with practice, but knowing what pitfalls to sidestep can significantly accelerate your learning curve and prevent common frustrations. Even the most seasoned stylists know that a single misstep can compromise the entire look. By being aware of these prevalent mistakes, you can fine-tune your technique and ensure your efforts result in a truly dazzling, salon-quality finish, maintaining the allure of a star who knows her Celebrity Engagement Ring Styles 2026 as well as her signature scent from the world of Celebrity Perfume Choices And Trends.
1. Starting with Soaking Wet Hair
The Mistake: Attempting to blow dry hair that is still dripping wet.
Why it’s Bad: This significantly increases drying time, exposing your hair to prolonged heat, which can lead to excessive damage, dryness, and frizz. It also makes it harder to create volume and shape, as the hair is too heavy and saturated.
The Fix: Always towel-dry your hair until it’s about 60-80% dry before beginning the actual blowout with your round brush. Use a microfibre towel or a cotton t-shirt to gently squeeze out excess water. This initial rough dry saves time and minimizes heat exposure.
2. Skipping Heat Protectant
The Mistake: Neglecting to apply a heat protectant before blow-drying.
Why it’s Bad: This is perhaps the most damaging mistake. Direct, high heat without a protective barrier can literally cook your hair, leading to split ends, breakage, dullness, and severe long-term damage.
The Fix: Heat protectant is non-negotiable. Apply it generously and evenly throughout your damp hair, from roots to ends, before any heat styling. Think of it as sunscreen for your hair.
3. Using the Wrong Brush Size or Type
The Mistake: Using a brush that’s too small, too large, or made of inappropriate materials for your hair type and desired style.
Why it’s Bad: A brush that’s too small will create tight curls rather than bouncy volume. One that’s too large won’t provide enough tension for smoothing or shaping shorter layers. Incorrect bristles can snag hair or fail to deliver shine.
The Fix: Invest in a few different sizes of round brushes (medium to large for most blowouts) and consider bristle type (mixed boar and nylon for versatility, ceramic for faster drying). Match the brush size to the length of your hair and the desired curl/volume.
4. Not Sectioning Hair Properly (or at all)
The Mistake: Trying to blow dry your entire head of hair at once, or taking overly large, messy sections.
Why it’s Bad: This leads to uneven drying, frizz, and a lack of control. You won’t be able to apply even tension, and some sections will be over-dried while others remain damp, causing the style to fall quickly.
The Fix: Always work in clean, manageable sections, no wider than your brush and about 1-2 inches thick. Use good quality sectioning clips to keep the rest of your hair out of the way. This allows you to focus heat and tension effectively on each piece.
5. Forgetting the Concentrator Nozzle
The Mistake: Removing the nozzle from your blow dryer during styling.
Why it’s Bad: The nozzle concentrates the airflow, directing heat precisely where you want it. Without it, hot air blows indiscriminately, causing frizz, disturbing the cuticle, and making it impossible to smooth and shape effectively.
The Fix: Always use the concentrator nozzle. Point it downwards, following your brush, to smooth the cuticle and create shine while preventing frizz.
6. Skipping the Cool Shot Button
The Mistake: Not using the cool shot button to set each section.
Why it’s Bad: Heat shapes the hair, but cold air sets it. Skipping the cool shot means the hair cuticle remains open, and the shape you’ve created is more likely to fall flat or frizz as soon as it’s exposed to humidity or movement.
The Fix: After drying each section with heat, blast it with the cool shot while it’s still wrapped around the brush. Hold for a few seconds, then gently unroll. This locks in the volume, curl, and shine, making your blowout last longer.
7. Over-Drying or Under-Drying Sections
The Mistake: Applying too much heat to one section until it’s brittle, or leaving sections slightly damp.
Why it’s Bad: Over-drying causes irreversible heat damage, leading to dry, straw-like hair. Under-drying, especially at the roots, means your style won’t last and will likely frizz or flatten almost immediately.
The Fix: Ensure each section is thoroughly dry and cool to the touch before moving on, but don’t linger with heat once it’s dry. Move the dryer constantly to prevent hot spots. If
Recommended Resources
Related reading: Kid Friendly Home Decor Ideas (Veralyn Media).
For more on how to achieve, see How To Find Your Personal Style As A Woman on Sometimes Daily.